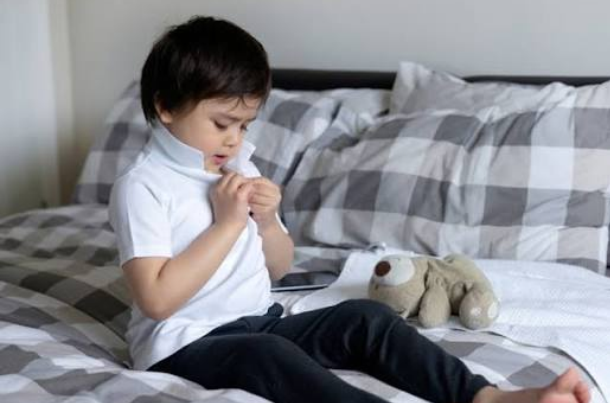
Something as small as a clothing tag can turn a peaceful morning into a struggle. Your toddler pulls at their collar, asks to take their shirt off, or cries without being able to explain why. Learning how to remove irritating clothing tags can help you make a favorite outfit more comfortable, but the way you remove the label matters.
A quick snip sometimes leaves behind an edge that feels even scratchier. Pulling a tag out can damage the seam holding the garment together.
Before reaching for the scissors, take a moment to check how the label is attached. A little patience can save the outfit and spare your child another uncomfortable try-on.
Why Clothing Tags Can Bother Toddlers
A label that feels barely noticeable to you may be distracting to your little one. Its corners might rub against the neck, or a stiff care label may brush the waist whenever they move.
Some children are particularly sensitive to clothing textures, seams, and labels. If your toddler also struggles with socks, waistbands, or certain fabrics, our guide to toddler clothing sensitivity offers more ideas for understanding their discomfort and making dressing easier. Check your child’s individual response rather than assuming that the same alteration will help every toddler.
However, the tag isn’t always the only problem. A tight neckline, raised seam, or itchy patch of skin may be nearby.
Begin by checking the exact spot your toddler keeps touching. You might say, “Something feels scratchy here. Let’s have a look.” That simple response shows them you’re listening while giving you a place to start.
Before You Remove a Tag, Check What It Tells You
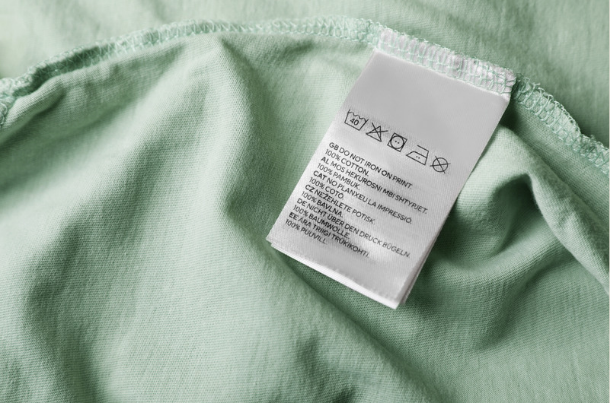
Some labels contain more than a brand name. They may explain how to wash the garment, identify its fabric, or provide important safety information.
Take a clear photograph before making any changes. Include the size, care symbols, and any warnings. If several garments look similar, photograph the whole item too so you know which instructions belong to it.
For sleepwear, preserve the safety information especially carefully. In the United States, snug-fitting children’s pajamas that are not flame-resistant carry labeling explaining their intended fit.
Removing an uncomfortable label does not change those instructions. Do not alter the intended fit of snug-fitting pajamas, stretch them deliberately, or use heat or chemicals to remove a warning. If you cannot preserve the garment’s safe construction, choose another suitable item. If the clothing will later go to another caregiver or family, pass along the information with it.
How to Remove Irritating Clothing Tags Carefully
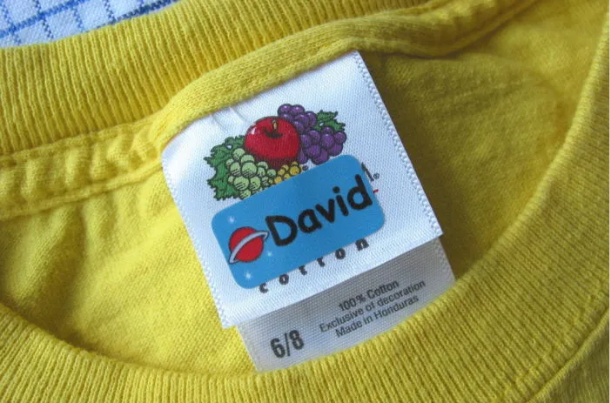
The best method depends on how the tag is attached. There is no single cutting technique that works safely for every label.
Always take the clothing off your child before working on it. Sit somewhere well lit, with the garment flat and your toddler away from the tools.
Step 1: Find the Tag That Is Actually Causing Trouble
Turn the garment inside out and inspect the area your child has been pulling or rubbing.
Run your fingers over the label, its corners, and the stitching underneath. Check whether several labels are stacked together. Sometimes the long care label is the problem while a smaller, softer label feels fine.
You may also find a plastic retail-tag fastener left in the fabric. Remove any remaining pieces before the garment is worn.
If you cannot identify the uncomfortable feature, try a different outfit rather than cutting several places at once.
Step 2: Examine How the Label Is Attached
Look closely at the stitching on both sides of the fabric.
A label may be:
- Attached with a separate row of stitches.
- Secured at two corners.
- Caught inside the neckline or side seam.
- Printed directly onto the fabric.
A separately stitched label is often easier to remove completely. A label caught in a structural seam needs more care because the same stitching may hold the garment together.
If you’re unsure which threads do what, pause. A tailor or someone experienced with sewing can help you avoid opening the seam.
Step 3: Gather a Few Simple Tools
For a separately sewn label, a small seam ripper can help you lift and cut individual attachment stitches.
Small sewing scissors and tweezers may also be useful. Keep a container nearby for the removed tag and thread scraps.
You don’t need an elaborate sewing kit. What matters most is good visibility and being able to distinguish the label’s stitches from the garment itself.
Keep sharp tools and loose pieces out of your toddler’s reach throughout the process. Put tools away securely before the try-on, collect every scrap, and check the work area for any dropped sharp item. Never work on the label while the garment is on your child.
Step 4: Unpick a Separately Attached Label Slowly
Gently lift the label enough to see the thread underneath without stretching the fabric.
Slip the seam ripper beneath one clearly identified label-attachment stitch without catching the garment fabric. Keep the sharp end directed away from your fingers and body. Cut that stitch, then reassess before moving to the next. If you cannot separate the thread clearly, stop rather than pushing harder.
Work a few stitches at a time. As the label loosens, use tweezers or your fingers to lift away the freed thread.
Avoid pulling hard. If the fabric gathers or the seam begins opening, stop and inspect what you are cutting.
Complete removal can avoid leaving a stiff label edge, but it is only appropriate when you can separate the attachment stitching safely.
Step 5: Be Careful With Labels Caught in a Seam
If the tag is sewn into the seam that joins two parts of the garment, cutting the stitches may open that seam.
You have a few options. You can leave it for someone who can remove the label and resew the seam, choose another garment, or carefully trim the label if the remaining material will be comfortable.
If trimming, keep the scissors away from the garment fabric and seam threads. Don’t try to cut so closely that you risk making a hole.
Trimming may reduce the label’s size without solving the scratchiness. A short, stiff remnant can still rub against the skin.
Step 6: Check for Rough Edges and Loose Threads
Once the label is removed or trimmed, inspect the area closely.
Look for thread scraps, sharp corners, holes, and any seam that has loosened. Run your fingers gently over the spot from different directions.
Removing or unpicking an irritating label is only useful if the finished area feels comfortable too. A remaining rough edge can be just as bothersome as the original tag.
If you repaired the seam, check that the repair hasn’t created a thick knot or raised area where your child’s skin will touch it.
Step 7: Offer a Calm, Brief Try-On
When the garment is ready, let your child try it during an unhurried moment.
You might ask, “How does your shirt feel now?” A young toddler may answer by pointing, pulling, or simply returning to play.
Keep another comfortable outfit nearby. If your child still dislikes the garment, check the seam, fit, and fabric instead of assuming the tag removal failed.
Your child’s response gives you useful information. They don’t need to keep wearing something uncomfortable because you spent time fixing it.
A Quick Guide to Choosing the Next Step
Before cutting, decide whether you can identify a separate label attachment. This is a practical clothing repair, not something you need to complete if you are unsure.
| What you find | A cautious next step |
|---|---|
| A label with separate visible stitches | Slowly unpick only its attachment stitches |
| A label caught inside a garment seam | Seek sewing help or choose another outfit |
| A printed label | Avoid blades, solvents and heat; check manufacturer guidance |
| A trimmed label that remains stiff | Reassess instead of continuing to cut |
| Persistent rash or discomfort | Consider a skin issue and seek advice when needed |
This table cannot guarantee that a particular garment can be altered without damage. Delicate fabric, stretch stitching, and complex seams may need a different approach. It is reasonable to stop before making a small repair into a bigger problem.
Should You Cut or Unpick a Clothing Tag?
Base this decision on the stitching, label material, and your confidence with the task.
Unpicking is usually the more complete option when a tag has its own attachment stitches. It allows you to remove the label rather than leaving a strip behind.
Trimming may be simpler when the tag is caught in a seam, but it can leave an irritating edge. Feel the remaining material before offering the garment to your child.
Don’t tear the label out. Even a small tag can pull on the surrounding fabric and damage it.
If the garment is delicate, expensive, or a much-loved favorite, getting help with the sewing may be worth the extra step.
What About Printed Labels?
Printed labels cannot be unpicked like sewn tags.
If the print feels rough, avoid scraping it with a blade or experimenting with solvents, adhesive removers, or high heat. Those methods can damage the fabric or leave an unsuitable surface against your toddler’s skin.
Check the manufacturer’s guidance. Washing according to the care instructions may change how the garment feels, but it won’t reliably remove the print.
Sometimes choosing a different shirt is the most practical answer. A “tag-free” design can still be uncomfortable if the printed area feels stiff.
What If You Cannot Remove the Tag Right Away?
If your child is uncomfortable, changing into a familiar outfit is a reasonable first step.
For suitable daytime clothing, turning the item inside out may move a label away from the skin. Check that seams, fastenings, and fit remain comfortable and that the clothing still functions properly.
Avoid sticking ordinary tape over the label. It can peel, leave residue, or create another uncomfortable edge. A loose temporary covering can also shift during wear.
If you want a label covered permanently, ask someone experienced with sewing to assess whether a securely attached, smooth fabric covering would work. The stitching should be comfortable too.
When the Tag Is Not the Whole Problem
A toddler who continues scratching after changing clothes may have skin irritation rather than—or alongside—a clothing problem.
For children with eczema, avoiding irritating tags, using comfortable loose-fitting cotton daytime clothing, and choosing fragrance-free, dye-free detergent may help reduce triggers. Follow the child’s own treatment plan; label removal cannot treat an underlying skin condition.
Speak with your child’s pediatrician about recurring rashes, persistent itching, pain, or broken skin. Spreading warmth, swelling, weeping, pus, fever, or a child who seems unwell warrants prompt medical advice. Also ask for guidance if clothing distress regularly interferes with sleep, childcare, or ordinary activities.
Removing labels can improve comfort, but it doesn’t replace assessment of an ongoing skin or dressing difficulty.
Frequently Asked Questions
Can I simply cut the tag off with scissors?
Why is the tag still scratchy after I cut it?
What is the easiest way to remove a sewn-in label?
Should I remove every label from my toddler’s clothes?
Can I remove an irritating label from pajamas?
Does disliking tags mean my toddler has a sensory condition?
Can I Use a Lighter or Heat to Seal a Scratchy Cut Edge?
Should I Wash the Garment After Removing a Tag?
Can a Soft Fabric Cover Solve the Problem?
What if My Toddler Still Pulls at the Same Spot After Removal?
Final Thoughts
A scratchy tag may seem small, but making your child comfortable is a worthwhile reason to pause.
Take the garment off, check the stitching, and work slowly. Sometimes a few removed threads solve the problem. Other times, the outfit simply isn’t a good match, and that is useful to know too.
You don’t have to fix every piece of clothing. Start with what your toddler enjoys wearing and make changes where they help. Listening to that little “scratchy” or “off” is one more way you show your child that their comfort matters.
For the next outfit, start with one careful inspection and keep a familiar alternative ready. If the repair is uncertain, asking for sewing help is a useful next step, not a reason to make your child keep wearing something uncomfortable.
For more practical ideas to make toddler routines gentler and more comfortable, explore Little One Haven. Start with what helps your child, and take each small step at your family’s pace.
Resources
Consumer Product Safety Commission: Children’s Sleepwear Safety
NHS Children’s Occupational Therapy: Strategies for Dressing Sensitive Children
American Academy of Dermatology: Atopic Dermatitis Self-Care
Disclaimer
This article is for general educational and parenting information only and does not replace individualized medical, dermatological, occupational therapy, clothing-safety, or sewing advice. Always remove clothing from your child before using scissors, seam rippers, or other tools, and keep sharp tools and loose pieces out of reach. Preserve important care and safety information, especially for children’s sleepwear, and avoid altering garments in ways that affect their intended construction or fit. Speak with your child’s pediatrician about recurring rashes, persistent itching, pain, broken skin, or clothing distress that interferes with daily activities. Spreading warmth, swelling, weeping, pus, fever, or a child who seems unwell warrants prompt medical advice.
About the Author
Geeta Yogi writes warm, practical parenting content about toddler comfort, clothing sensitivity, dressing routines, child development, skin concerns, and everyday family challenges. She focuses on clear, supportive guidance that helps parents make practical adjustments, understand their child’s responses, and recognize when medical or occupational therapy support may be helpful.